
SEG
2105 Lab 2 / Assignment 3: Getting Started
Creating the proper environment &
Loading the proper environment into Eclipse Integrated Development Environment
Note: the following images come from Eclipse 3.2, but it the lab has been tested in versions of Eclipse up to 4.2 (Juno).
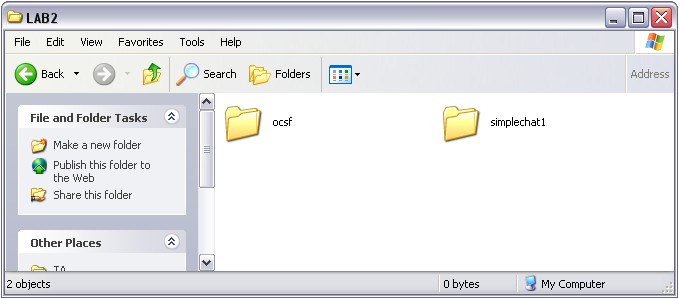
Please mimic the above on your H: drive by
- Downloading the following zip file containing the code for OCSF and Simple Chat Phase 1.
- Creating a directory called "lab2".
- Extracting the ocsf and simplechat1 directories from the zip file into the lab2 directory, exactly as above.
To Load the proper environment into Eclipse, follow these steps
- Start up Eclipse using the windows start button. Find the Eclipse application in the list of programs.
-
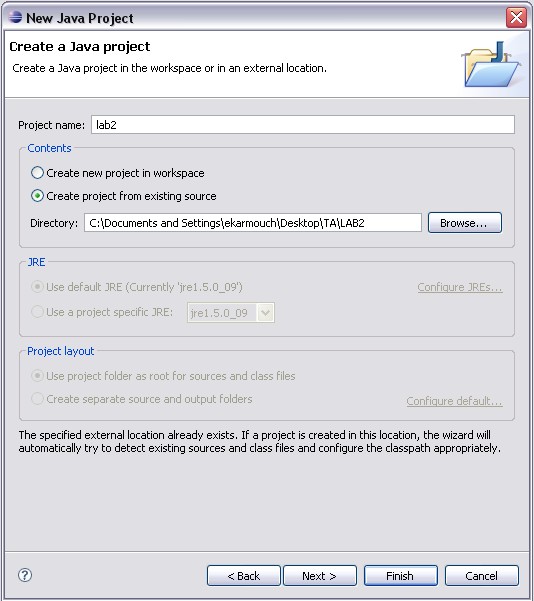
Go to File, New -> Project.

- Select Java Project and click Next.

- Call your project 'lab2' and 'Create project from existing' lab2 directory. Click next.
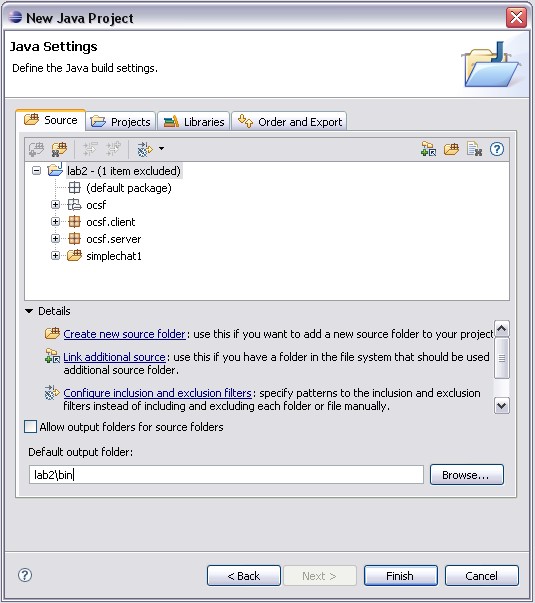
- In the next window, you are able to modify the output folder as shown below and click Finish.
(You don't have to, but I like to separate source and compiled code, so I set the output folder to be 'lab2\bin')
- You should now be in your editing environment. If you
expand the folders shown bellow within the 'Package Explorer' window,
you should see your respective java files.

- Create two run configurations (introduced in lab1): One
for ClientConsole and a second for EchoServer. (Click 'close' not 'run'
when prompted)

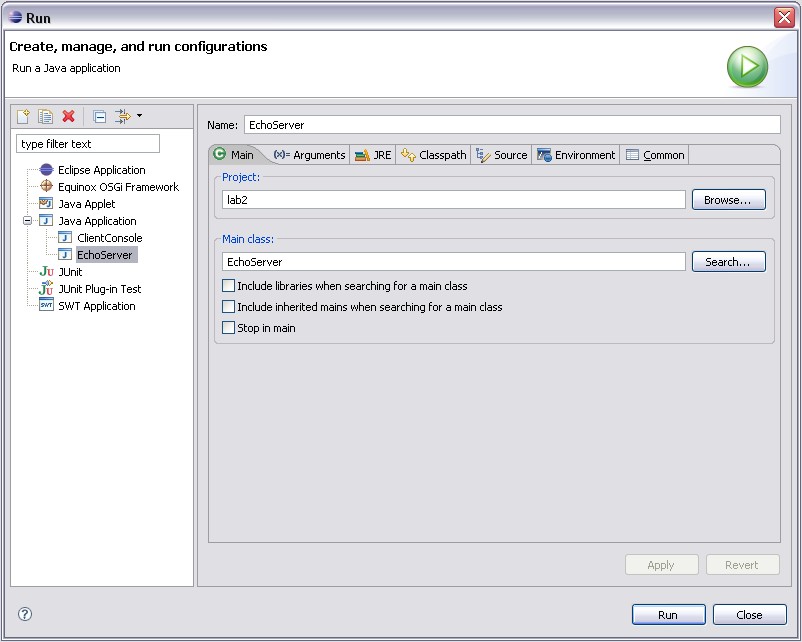
- In order to run the chat application, you must start the server first: RUN the EchoServer configuration.
- A window pane will appear showing the message “Server listening for connections on port 5555”.
- Now, RUN the ClientConsole configuration.
- Type something in the window and you will see it echo back.
- Try running the server and client on seperate machines. (HINT: You
will need to pass the IP address of the server as an argument when running
ClientConsole)
- Proceed
to the lab 2 instructions